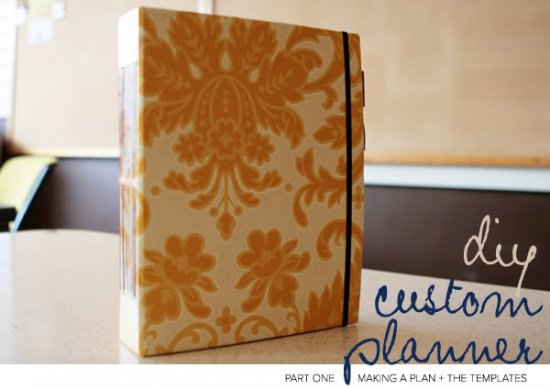
I’m a big time management geek and I love looking for new ideas on ways to make my days flow better. One thing is for sure, I’m always experimenting with ways to lower my stress and get lots done, but also to build in more fun to my life. I’m married to my day planner and in my experience, if it’s not written down, it doesn’t get done. This usually includes fun things like remembering to explore new books or get inspired by new blogs. Left to my own devices, I’ll end up wasting that time (watching Netflix) or get sidetracked (by watching Netflix), or get sucked into my e-mail (while watching Netflix).
On any given day a big part of my success and feeling good about what I’ve done relies on being extremely focused- and while I love my little Filofax, it hasn’t been working for me lately. So being me, I got excited and dreamed up a made from scratch day planner that would help me run my life and have lots of fun in 2011.
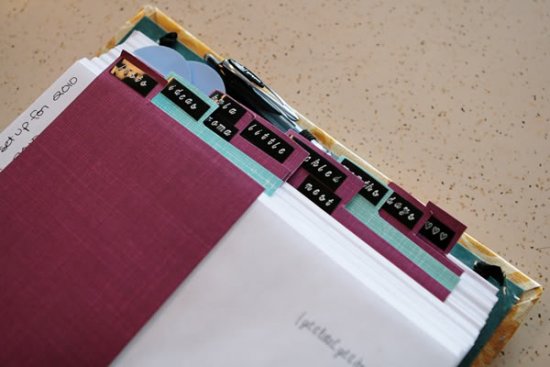
I’m excited to take you through my process in three posts over the next couple of weeks. I will show you how to make your own custom planner if you want a daily DIY fix that’s always close at hand. I’ll be breaking it down into two parts:
Part One: Making a Plan
Part Two: Sewing Signatures & Bringing it all together
![]() Before I made my planner, I thought a lot about the areas of my life that send me scrambling for a notepad most often. Off the top of my head I knew I needed to cover six big areas:
Before I made my planner, I thought a lot about the areas of my life that send me scrambling for a notepad most often. Off the top of my head I knew I needed to cover six big areas:
1. To Do Lists of things to be scheduled later
2. Ideas for my blog
3. Ideas for jewelry making and knitting patterns
4. Ideas for Freckled Nest
5. Monthly blog post planning
6. My plans week to week
These are the basic things I want to have with me at all times, so no matter where I am (or if I have my laptop) I can pop something into my planner and know it was scheduled or noted for later.
Most of these are simple, #1 – #4 couple be made up of blank paper, or something with a simple embellishment, for me to make a quick note on. My monthly blog post planning can be done on a simple monthly calendar, which I can make in Photoshop to suit my needs, and my week to week plans are definitely the most important part.
But as I was laying out all the things I needed to get done, a question popped into my head:

Last year I had a big revelation. When I wrote down lists of things that made me extremely happy on particularly hard days, I had a small database of ideas that would turn my whole day around. I started making small inserts of things that made me happy, and paper clipping them into the middle of my planner. They would remind me to read books, take bubble baths, watch my favorite movies, and call a friend if I was feeling worn out. Simple things that were guaranteed to make me happy. After a month, I felt so much better about my work-life balance. I wanted to expand on that idea for my planner.
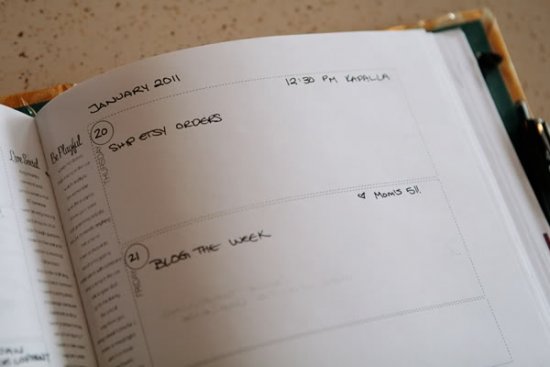
I feel the most grounded and connected when I’m sharing and reaching out. The main ways I can do that is in real life and on social media. I sketched out an idea of what would affect my happiness and quality of life the most. In other words, in my ideal world, what would I do with my time online? What would I do with my time offline?
I listed 30+ things in both categories Live Social for social media and Be Playful for real life. I popped them into the center of my weekly planner pages. This way they aren’t part of a to-do list, they’re more like an ongoing scavenger hunt! It is something I can circle back to as I complete them each week!
When it was done, I sent mine to print at a local big box office supply store. It was super affordable and I did it all online! Want something a bit different? You could make your own pages in a word processor. You could use tables in a word processor or a spreadsheet to build your pages. Just leave a gap in the center of the page where you’ll be stitching through them in the next post.
Next week, we will build the cover! I’ll show you how to hand sew these into signatures using the method Leigh-Ann and I demonstrated on LA-TV last month.

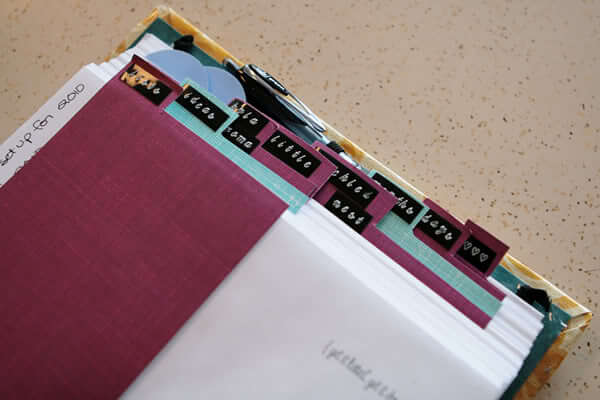
I really love this custom day planner.
I think I’m going to make my own for 2016, that way I can stay organized. Having 5 kids is rather hectic. Hopefully, I’ll be able to make mine and actually use it. Love your creativity.
Thank you so much for this! I’m making my own photo diary and these templates are super useful!
Thanks so much!!
It is just the inspiration I needed;)
Everything about yesterday has gon with yesterday.
Today, it is needed to say new things. – Rumi
This is AWESOME!!! What are the margins you used?
Thank you so much for this! You’re optimism is contagious.
Can you design a planner with only 6 days? That is leave out a certain day each week, such as a saturday. That way, no saturdays are shown in the planner?
Thanks
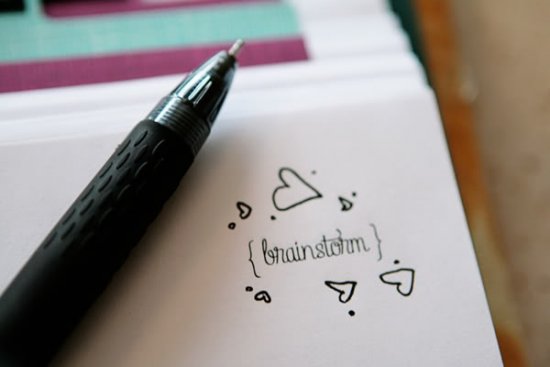
Hi! I love the font you used for the ‘brainstorm’ divider! Did you design it yourself or did you download it? Can you please tell me where you got it or maybe what it’s called?
Thanks ;)
It is a paid font called “Linguine” that she paid for a few years ago.
Hi! Just wondering if you ever posted the other two parts…maybe I just missed it, but I couldn’t find it on your website. Thank you so much for posting this…heading off to college and I know this will be so much help!!
I’m sorry I sent you searching Melissa, I didn’t realize that the second part wasn’t linked here! I’ve edited the post to include the link and you can access it here:
https://kylaroma.com/2011/02/making-a-custom-day-planner-part-two-sewing-signatures-binding-bringing-it-together/
No problem thank you so much..I seriously cannot wait to try this out and have the best Daily planner ever:)
The notebook doesn’t seem to be working for me. I like to keep my planner, book/movie journals and random thoughts that I put to paper together so I found myself with a shortage of blank pages but I did the planner for the whole year and not month by month, that could’ve worked better.
I’m still trying to find the perfect method and I welcome every suggestion. :)
I’ve been using old notebooks as planners but I’m trying to come up with something like this. I really loved your templates, specially the weekly one with the lists of small things that can really bright up the day. :)
I’m glad that you like it! If you’re interested in using a notebook as a planner, I’ve been using one of those this year and I shared the way that I created mine from a Moleskine here:
https://kylaroma.com/2012/01/moleskine-notebook-transformation-a-no-binding-required-weekly-planner-tutorial/
Thanks for letting me know this was helpful! :)
I’m trying to make a daily planner for myself and I love your template but I would like to edit it. How did you design your template or how do I edit it?
I’ve referred to this page over 10 times this week! I’m absolutely obsessed with the idea of making my own planner. I bought a mini binder from Staples, and I’ll just use the custom sheets. Thanks so much for this awesome post!
What software did you use to make the PDF templates?
This was amazing and so helpful!! It’s beautifully put together, I just hope mine turns out the same!! x
Super cute and creative! I’m totally bummed that I just bought a new planner, but I might have to throw it in a dumps since I can make one fully customized for me! Thanks!
Just loving it!
I gladly shared it on mu blog (Estonian) and I’m planning to start the project soon. At this moment I’m having a rush of ideas – it will be more like my very personal year book with lots of inspiration inside – some pictures and interviews and…
And I thought that it would be a perfect gift for someone you love – adding different customed fragments.
I posted a link to this in my Weekly Favourites post on my blog – http://the-red-deer.blogspot.com/2011/01/weekly-favourites_23.html
Hahahaha! You had me at “watching Intervention”. I can’t stop watching that show, for real!!! As I print and use this GORGEOUS custom planner you’ve created…I’ll be scheduling “watching Intervention” right next to “watching Intervention” followed by…”watching Intervention”.
Kyla – thanks for posting how you made your day planner. It’s gorgeous. I will have to try to make one for myself one year. maybe if i start now, the one that I make will be ready for 2012! I think that you should make another one and hold a giveaway on your blog =)
Great idea and so creative.
I am amazed by your abundance of creativity. Simply amazed.
I love lists and notes and writing everything down. However, I don’t really use day planners. I ‘m more of a notebook person. This however is perfect and would suit me as well. It’s a great combination of a day planner and a notebook.
oh i love this. already downloaded the templates. :)
i’m excited about the next round! xo
I love your planner – normally I’m not big on them (always start with big intentions then they end up unused) but the Live Social and Be Playful lists make so much sense to me. I have similar lists in the Stickies on my Macbook, or written various places, but having them in your planner as a physical reminder to strive for those things each week is perfect! You’re a genius! x
Love this! Can’t wait to make a planner! And I love that you call yourself a time management geek! Ha!
Eeeeeee! I’ll be downloading the weeklies for sure! Can’t wait to make my new planner :) Thanks for doing this!
Love this so much!! I’m a HUGE fan of time management and finding helpful tools to be more productive and creative! You may of heard of this book “Getting Things Done”. I read it during my last year of college and really found it helpful for processing workflow and time management. The cover looks boring, but the information is super helpful and amazing. http://www.amazon.com/Getting-Things-Done-Stress-Free-Productivity/dp/0142000280
Thanks so much for sharing this project! Look forward to the other posts about it!
-Sav
Thanks so much for sharing this Sanannah! That’s new to me, I’m excited to check it out :)
Eek these are so cute, I have printed out extra inserts to slip into my diary – my current week is full of scribbles! Great job!
Blue Skies,
Charlotte xo
i saw you featured at gussy so i thought i would check out your blog! i mentioned it over there…but i will again here…i’ve been thinking about contacting freckled nest design so it was neat to learn some more about one of the team members! this planner is so very, very cool! i just bought one, however, this is so much better….i think i’ll be replacing the store-bought one!
This is perfect! I’ve been meaning to get a new day planner but I can never find any I like at stores. Thanks for this :)
Hi! I saw your feature over at Gussy’s site today and am enjoying browsing your site. :) LOVE this planner idea and can’t wait to see parts 2 & 3. Can I be a complete dork and ask what kind of pen that is? { I’m an office-supply FREAK. LOL }
I’m right there with you on being a supply geek! :)
It’s a Uniball Signo 207 and they’re my absolutely my faves.
THANKS! You know I’m totally going to have to make an OfficeMax/Staples-run now… ha ha.
I was struggling with something pertaining to this last weekend, when I saw some awesome (albiet Mom) planners in a local bookstore. I didn’t purchase one because buying something with the label of Mom kind of freaks me out. And then I stumbled upon this today, and you better believe I am going to use these templates.
Thanks for posting this, Kyla! I’m super excited about this now!
Wow! This is so awesome! Can’t wait to see the other posts!
This is definitely inspiring! I haven’t used InDesign in a long time, and you’ve given me the best excuse ever. Thank you!
That is so awesome, Kyla. You should really sell these in your shop! I would totally buy one. I am a planner nerd through-and-through (unfortunately I am NOT a very crafty nerd! Lol)
Also thanks to you and Leigh Ann I’m highly addicted to Storage Wars. I’ve been spreading this infectious disease on twitter. Thought y’all should know what you’ve started.
oh Kyla! I’ve been patiently waiting on this post and you did not disappoint. I love, love, love your life lists in the weekly sections – a brilliant idea and wonderful way to get out of a rut. I can’t wait to see more about your planner building process!
luv all of your idea’s for the planner!
i am a total list maker & calendar filler’ in’er..teehee!
i also keep my daytimers after the year is over-so many times it has come in handy to be able to pull them out and figure out when something happened etc.
BUT my planners are boring office stock..I want one like yours!
Question–what is the orange cover made of? If that is paper I definately need some!
Have a great day,
Vanessa
Thanks Vanessa! The cover is made from thrifted vintage wallpaper- I’ll be covering it in detail next week :)
Lately I’ve been feeling an urge to return to a paper planner instead of relying on my Blackberry (even more so since my syncing is tripling all my appointments!). I love your Live Social and Be Playful list ideas.
This is fantastic! I love planners but after months and months of looking for what I want, I can’t find it! (which is so weird to me, what I want included seems so basic, but it’s never in the same planner). I hope the next 2 posts come soon! (I’ll probably also blog about this when all the posts are up and my planner is made, I’ll send the link in the last post!)
:)
This looks awesome! I waited to long to buy my 2011 planner and now I can’t find my beloved pocket sized Moleskine so I may have to do this instead. I imagine it ends up being quite large. Does it fit in your purse?
I saw you over at Gussy and I had to come and say hello to someone that shares the awesome name of Kyla!
What a great idea!
I’ve had day planners for as long as I can remember… but I usually just bought a big, simple planner at the store and then embellished it and stuck a lot of notes/stickers/ideas/photos into it later… so it was somewhat of a planner/scrapbook at the same time :)
I am really thrilled about this… can’t wait to see how you put it all together.
This is fantastic! I need a new planner, but since I’m broke I cannot afford to buy one. This is going to be great! Thanks Kyla!
Lovely! I am way too disorganised for this lol but it’s very pretty :)
I love your little question – I was teaching my new students the very same thing on their first day yesterday; if you’re having a bad day, just think of the blessings you do have – go back to that mental collection, and you can totally make the choice to turn the whole day around :)
This looks awesome! I totally love planners and organising myself so I can’t wait to see the next parts to this diy. Thank you!
I LOVE this, Kyla! I love planners and have never been able to find a template with enough weekly space for me to put all of my notes in. I made my own last year, but I’m excited to give yours a try!
Love. This. + All things planner-y, but especially how cute yours is. Can’t wait until the next post.
I’m a bit envious of your creativity (in a good way!). you never cease to amaze & inspire me :)
I am so excited about this post:) Thanks so much for sharing and I can’t wait to see more!
:)Gina
Thanks for sharing these with us, Kyla! I already have a planner that I absolutely love (and probably paid waaay too much money for), but I appreciated the lists for Live Social and Be Playful. I printed those out and will be adding them to my planner.
You are a genius! :)
This is such a great idea.
I’m excited to see the rest!
so i just bought a new planner, but i might just do this instead, it’s SO much better! this makes me REALLY excited… i’m a total planner nerd. ;)
Love this! Can’t wait to see the rest
I’m SOOOO pumped about this!!! eeeeek!
Superior thinking deonmstarted above. Thanks!
Oh my gosh. Kyla… you are literally my hero. If it weren’t for you my life would have never changed. I grew up with horrible parents, I had my first baby when I was 16, because I was crazy. After that I changed. I got better. I grew up more, and so did my child. He took off without saying goodbye the day he turned 18. I married, and thought my life couldn’t get any better. After a couple of years, my husband lost his job. We were hopeless with money. This website has helped me organize my life. You are my hero….
Corada thanks for posting this. Just yesterday my oldest turned 18 and left home and I’m devastated. Knowing others have faced that and moved on and life is ok makes my heart glad. It’s proof we are bigger than our circumstances. :)
Corada, you’ve left me completely speechless. Thank you for sharing your story! I’m honoured to be part of it. The hard work was all yours, and even though we’ve never met? Please know that I’m wildly proud of you <3